

When we face a patient with a white morgagnian cataract, two factors are always unknown: the maturity of the nucleus and the size of the nucleus. The known factors of morgagnian cataracts are the presence of milky cortical fluid, weak zonules, and a weak capsular bag.
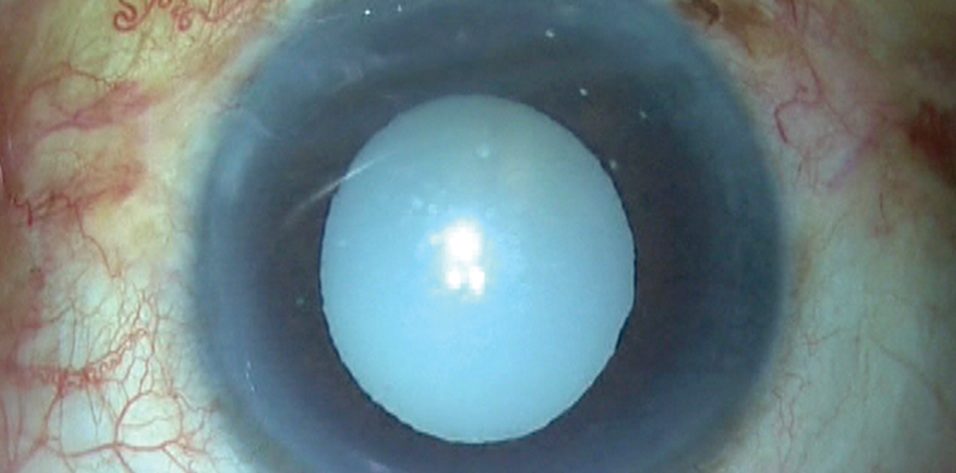
This was the situation when a patient presented to our clinic with a morgagnian cataract (Figure 1).
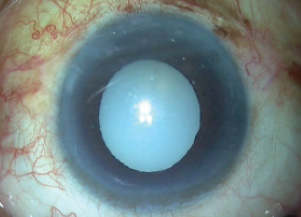
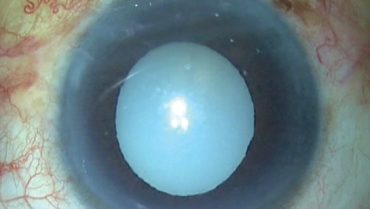
Figure 1. A white morgagnian cataract can present intraoperative challenges.
A CHALLENGING CASE
In surgery, after appropriate incisions were made, trypan blue dye was injected to stain the capsule (Figure 2) and an OVD was injected to fill the anterior chamber. With a capsulorhexis needle, a puncture was made in the capsular bag, and the milky fluid gushed out of the bag and then out of the eye, thereby reducing the intralenticular pressure (Figure 3).
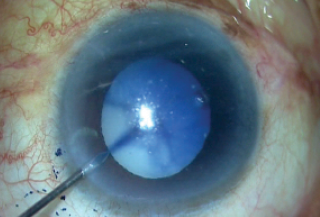
Figure 2. Trypan blue dye is injected to stain the capsule.
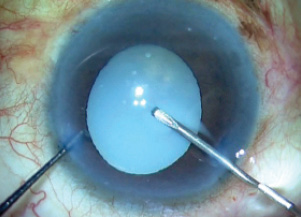
Figure 3. As the capsular bag is punctured, milky fluid gushes out of the bag.
The rhexis was then completed with great difficulty, using two instruments. Capsulorhexis forceps in one hand were used to create a tangential pull, and a Sinskey hook in the other hand supplied the counter-pull that is normally supplied by the zonules (Figure 4). This maneuver prevented further zonular loss.
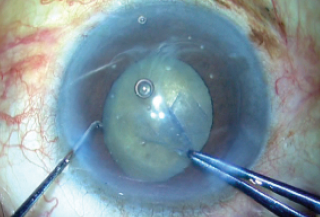
Figure 4. The capsulorhexis is completed using capsulorhexis forceps.
After the capsulorhexis was completed, a thorough examination of the bag was performed. This is an important step, as a break in the zonules or the bag can lead to a disastrous nucleus drop. I rotated the nucleus into the anterior chamber using a Sinskey hook and a rod (Figure 5), and once this was completed I reexamined the capsular bag. I noticed at this point that the bag was unstable (Figure 6), and I decided to move to plan B, rather than attempt IOL implantation in the bag.
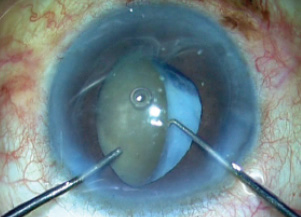
Figure 5. The nucleus is rotated and brought into the anterior chamber using a Sinskey hook and a rod.
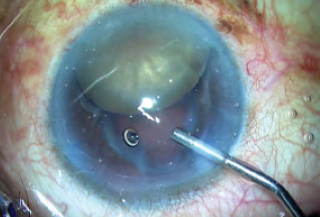
Figure 6. The unstable capsular bag is noted.
PLAN B
Plan B was to convert to the glued IOL procedure with intrascleral haptic fixation. To ensure a smooth transition, we measured the horizontal white-to-white distance. If the distance is less than 12 mm, a horizontal glued IOL technique is preferred, and if it is greater than 12 mm, a vertical glued IOL technique is preferred.
Two peritomies were fashioned 180° apart. Then, using glued IOL markers, partial thickness scleral flaps were fashioned, 2 x 2 mm in size, as shown in the surgical video (bit.ly/agarwal0719) and in Figure 7. A trocar anterior chamber maintainer was fixed to allow continuous infusion into the eye, as the globe tends to soften once the procedure starts and OVD is not longer successfully filling the eye.
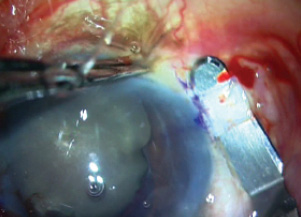
Figure 7. Partial thickness scleral flaps are fashioned.
Using a 23-gauge needle or a microvitreoretinal blade, sclerotomies were made under the flaps, directed toward the center of the globe (Figure 8). Anterior vitrectomy was then performed through all entry points—both limbal entries and both sclerotomies—with triamcinolone staining to ensure that all of the vitreous and remnants of the weak bag were removed.
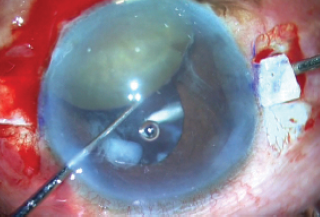
Figure 8. Sclerotomies are made under the flaps.
Two tips should be borne in mind in such a situation: Have a second instrument in hand to maneuver the nucleus while the other hand performs the vitrectomy, and inject pilocarpine into the eye before commencing anterior vitrectomy, as a small pupil will prevent the nucleus from falling behind into the vitreous.
The IOL was loaded into the injector cartridge, and the cartridge was then inserted into the incision so that one pole of the nucleus rested on top of the cartridge (Figure 9). Using glued IOL forceps through the left sclerotomy, under the iris, the leading haptic was grabbed and externalized through the sclerotomy while the IOL optic was pushed under the nucleus and iris, leaving only the trailing haptic outside the eye through the main incision. The trailing haptic was then grasped with glued IOL forceps and inserted inside the anterior chamber while making sure the glued IOL forceps tip held the nucleus at bay and toward the angle.
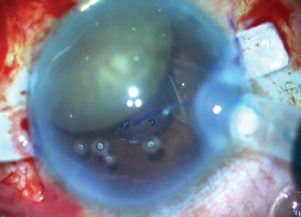
Figure 9. The IOL is injected under the nucleus.
With the left hand, a handshake technique was then performed, in which glued IOL forceps were passed through the left paracentesis and the trailing haptic was passed from one hand to the other (Figure 10). This was then repeated, as a second pair of glued IOL forceps was passed through the right sclerotomy, the trailing haptic tip was grasped by these right forceps, and the haptic was externalized through the right sclerotomy. Both haptics were now externalized.
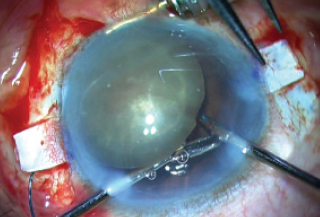
Figure 10. A handshake technique is performed and the trailing haptic tip is grasped.
In this position, the IOL was now beneath the iris and the nucleus. Scharioth tunnels were then created at the base of the scleral flaps, and both haptics were tucked into them (Figure 11).
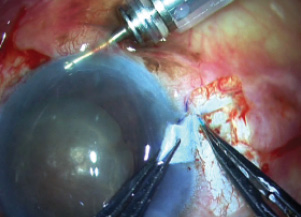
Figure 11. The haptics are tucked into the Scharioth tunnels.
With the glued IOL technique completed, a scaffold had been created, preventing nuclear pieces from falling into the vitreous cavity. I then injected cohesive OVD over the nucleus to protect the endothelium and emulsified the cataract in the anterior chamber (Figure 12).
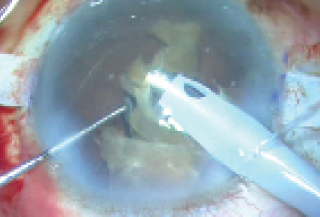
Figure 12. With a scaffold created to prevent nuclear pieces from falling into the vitreous cavity, the cataract is emulsified.
With the cataract emulsified, the haptics were checked under the flaps to ensure that they were tucked into the tunnels. I noted that one of the haptics had come undone (Figure 13), but it was easily externalized again using the handshake technique and tucked back into the Scharioth tunnel.
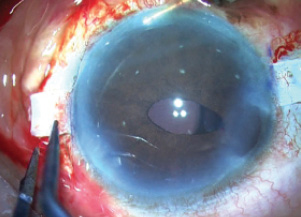
Figure 13. The trailing haptic has dislodged.
Finally, after everything was checked satisfactorily, the trocar was removed, the wounds were sutured, and fibrin glue was used to seal both flaps and then the conjunctiva on either side (Figure 14). The patient’s postoperative result is depicted in Figure 15.
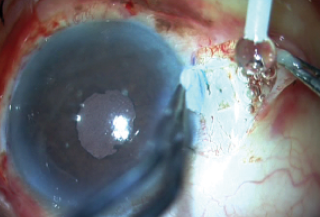
Figure 14. Fibrin glue is used to seal both flaps and the conjunctiva.
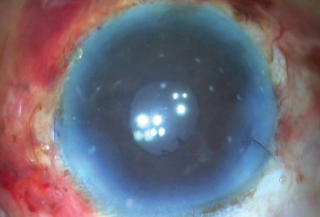
Figure 15. Image of the eye immediately postoperatively.
CONCLUSION
The glued IOL procedure, as described here, can be used in other complicated situations, such as a subluxated cataract, a dropped nucleus, or a posterior capsular rent. See Tips for Success in Morgagnian Cataracts for some pointers on how to navigate these difficult cases.
Tips for Success in Morgagnian Cataracts
- Tip No. 1: To complete the rhexis after the milky fluid has egressed, use two instruments: (1) capsulorhexis forceps to create a tangential pull and (2) a Sinskey hook to create the counter-pull that would usually be done by healthy zonules.
- Tip No. 2: In converting from standard phacoemulsification to intrascleral haptic fixation with glued IOL, measure the horizontal white-to-white distance. If it is less than 12 mm, a horizontal glued IOL technique is preferred. If it is greater than 12 mm, a vertical technique is preferred.
- Tip No. 3: In loading the IOL into the cartridge, look for the lucky 7 sign (Figure 9). This is important to ensure a great grab inside the eye.
- Tip No. 4: The cartridge should be inserted into the incision so that one pole of the nucleus rests on top of the cartridge (Figure 9).
The advantages of this procedure are that it does not require a large incision to explant the nucleus, which could induce astigmatism and increase the risk of other complications, and that nuclear fragment management with phacoemulsification is familiar. The drawbacks are that visibility is limited when IOL implantation is performed, and that it does not work in black cataracts as the amount of ultrasound energy required would be extremely high.
Is there an alternative way to approach a morgagnian cataract? Yes, and it is shown in the video. Unfortunately, this was patient impossible, not patient possible.

