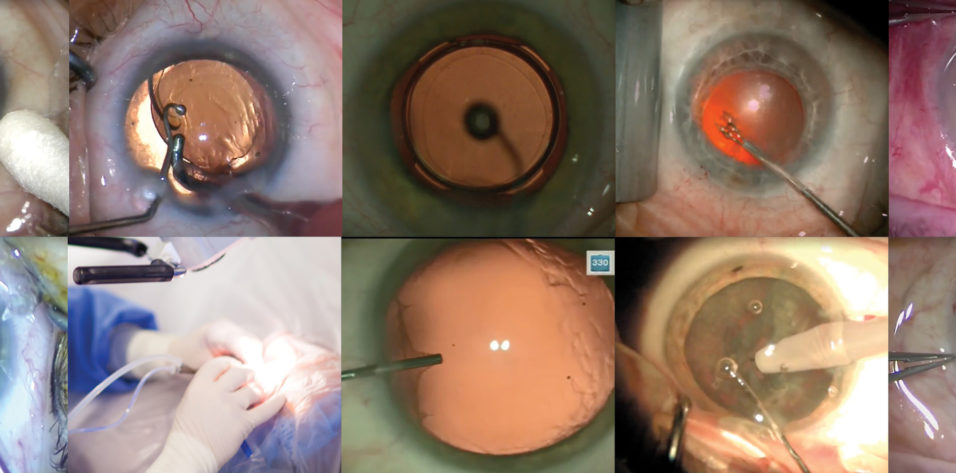
For this article describing my routine cataract surgery technique, please see my Eyetube video (bit.ly/mackool0220), demonstrating the instruments and maneuvers that I typically use. The procedure in that video is performed on the patient’s only good eye. Visual acuity in the other eye is worse than 20/200 because of macular degenerative changes. The operated eye also had some degenerative changes.
Preoperatively, I always discuss the visual goals with each patient. If near vision is a priority in a patient with macular disease, I consider leaving the patient myopic because myopia enables better reading than an emmetropic eye with a near vision spectacle. As low vision experts often advise, it can be advantageous to leave a low vision patient significantly myopic. In this eye, an AcrySof IQ monofocal IOL (SN60WF, Alcon) was inserted, and the refractive target was -3.00 D.
GETTING STARTED
I normally operate from the temporal position. Because of this patient’s overhanging brow, I push the speculum superiorly so that I have access to the superotemporal limbus. The sharp surface of the blade is oriented superiorly as I insert the knife to create the sideport incision (Figure 1). In this manner, should the patient suddenly experience a Bell phenomenon, it will not create a larger incision.
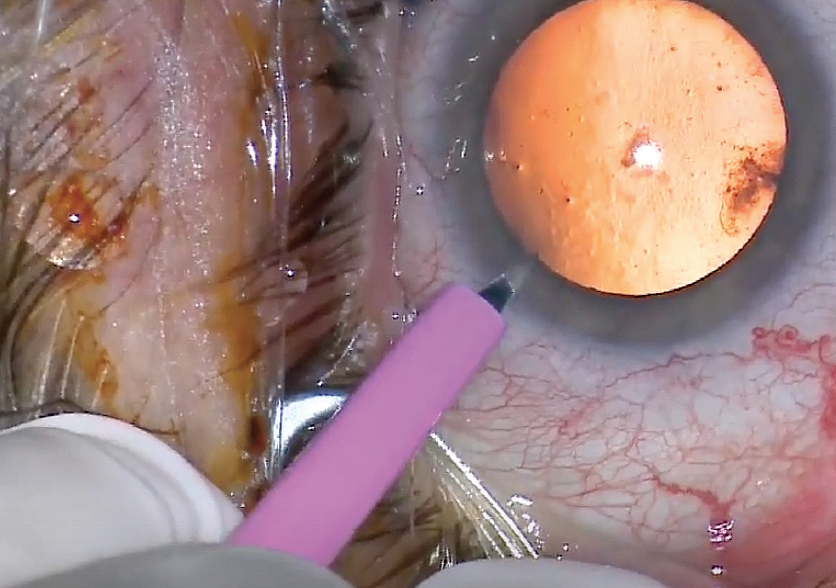
Figure 1. The sideport blade is inserted with the sharp edge oriented superiorly.
I make the 2.4-mm main incision with a clear cut keratome, entering about 2 to 2.5 clock hours to the right of the sideport incision, and then I inject lidocaine into the anterior chamber.
I use a soft-shell, dual-OVD technique, with the dispersive Viscoat (Alcon) injected into the anterior chamber first to protect the corneal endothelium, followed by the cohesive ProVisc (Alcon). After making an initial puncture in the capsule with a 25-gauge needle attached to the ProVisc vial, I use curved Mackool-Inamura Capsulorhexis Forceps (Duckworth & Kent) to execute the capsulorhexis while a spatula on the opposite end of the Mackool Big Ball Chopper (Crestpoint Ophthalmics) stabilizes the globe. The orange tint of the central red reflex is indicative that the retinal pigment epithelium in this eye is not highly reflective.
I perform hydrodissection with a flat 23-gauge Mackool cannula (Crestpoint Ophthalmics). After each of two fluid waves passes behind the nucleus, I depress the nucleus to avoid overexpansion of the capsular sac. Some surgeons rotate the nucleus at this stage; I typically do not find that step to be necessary. Hydrodissection is followed by 180º of viscodissection (nasal 180º) using Viscoat.
NUCLEUS DISASSEMBLY
Before inserting the phaco tip of the Centurion Vision System (Alcon), it is important to verify that infusion flow is excellent. I then insert the Mackool Big Ball Chopper into the sideport incision, just far enough to stabilize the globe, and introduce the phaco tip through the main incision. With the footpedal in position 1 (irrigation, no vacuum), the chopper is then advanced into the anterior chamber.
After aspirating anterior cortex, I sculpt the center of the nucleus with the chopper positioned over the nucleus equator, stabilizing the position of the nucleus. Using low flow and vacuum levels, I focus the Lumera (Carl Zeiss Meditc) or LuxOR (Alcon) microscope and increase magnification so that I can clearly see the lens fibers. When the central nucleus is thin enough so there is a good central red reflex, I can typically begin chopping.
I perform a nonimpale chop with the phaco tip and the chopper. For dense nuclei, I will often perform chopping with the impale technique, using 300 mm Hg vacuum with the phaco tip buried in the nucleus to stabilize it during chopping. After the first chop is performed, the nucleus is rotated bimanually prior to further chopping.
It may be safer to use low flow and vacuum settings for these maneuvers. In my video, I used higher (quadrant removal) settings for one of the chops, but I generally recommend using sculpt settings of about 18 cc/min flow and 300 mm Hg vacuum.
For quadrant removal with the balanced tip of the Centurion Vision System, a maximum phaco power setting of 65% is adequate. The nucleus in this eye is moderately dense, with brunescence extending to the periphery. Even for such a relatively dense lens, that power is sufficient. For a 4+ brunescent nucleus, I use an 80% power setting. A power of 100% is reserved for truly black nuclei.
The choice of second instrument is also important. I favor one with a very blunt tip, and you can’t get much more blunt than the big ball chopper that I use (Figure 2). The curvature at the distal end of the chopper allows it to pass over the edge of the nucleus and surround it within that curvature. Prior to performing the chop, I position the chopper somewhat vertically and then pull it toward the center of the nucleus where the phaco tip is located to perform chopping.
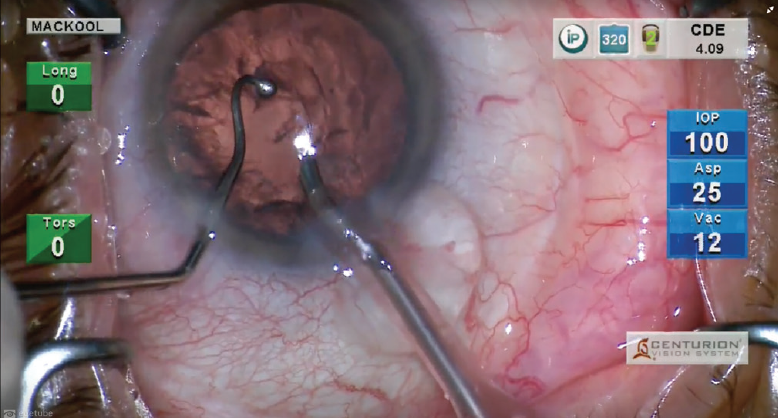
Figure 2. A big ball chopper is used as the second instrument.
IRRIGATION/ASPIRATION
After quadrant removal is complete, I switch to the I/A tip. Again, I test infusion to make sure it is adequate before entering the eye. I strongly recommend placing the aspiration port against cortical material before activating aspiration (footpedal position 2).
I don’t find that it matters much whether cortex is removed first from the subincisional area or from another location. However, infusion misdirection syndrome is more likely to occur when the tip is positioned in the subincisional area because the infusion port is directed at the zonular region and fluid is therefore more likely to pass through the fibers and into the posterior segment. For this reason, I usually remove subincisional cortex last, and I protect the posterior capsule while doing so by pressing the tip of the spatula against it.
After cortex removal, I aspirate lens epithelial cells for 180º from beneath the anterior capsule. There are two reasons for doing this (and no downsides). First, it reduces the possibility of capsule contracture. Second, it makes IOL exchange easier, should that be necessary, for at least several months because adherence of the capsule to the optic will be delayed for a prolonged time.
With nucleus and cortex removed, my attention is directed to the posterior subcapsular cataract that remains. I inject a cohesive OVD (ProVisc), stretching the posterior capsule taut as I simultaneously inject and rub the posterior subcapsular cataract with the cannula tip to remove the opacity.
IOL INSERTION
I stabilize the globe with the spatula inserted through the sideport incision and then insert the IOL injector. As the IOL is released from the injector, I use the spatula to tuck the trailing haptic and optic into the capsular bag before the IOL fully opens.
By the time I insert the I/A tip into the eye after IOL insertion, the haptics have usually released. If not, I typically use the chopper to release them after stabilizing the optic with the I/A tip in footpedal position 1 (Figure 3). Alternatively, forceps can be used to grasp and release the haptic, thereby freeing it from the optic.
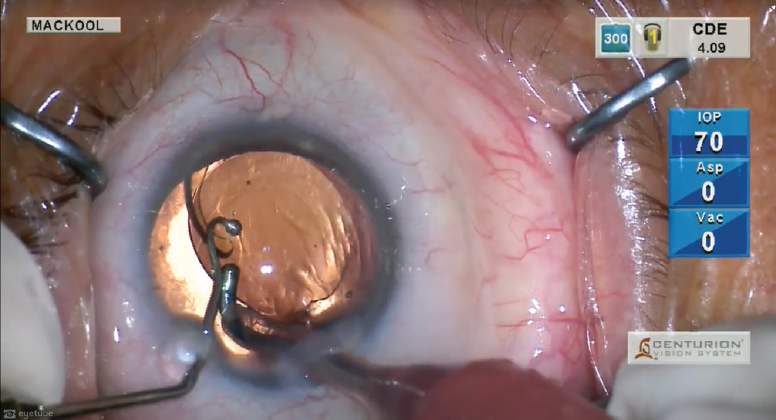
Figure 3. The haptics are released by stabilizing the optic with the I/A tip in footpedal position 1 and then pulling against the haptic with the chopper.
The I/A tip is then used to aspirate OVD from behind and in front of the optic, followed by stromal hydration to seal the incisions. To achieve this, I use a side-to-side motion with the infusion cannula and simultaneously deepen the chamber. I depress the optic to ensure that the haptics are well seated in the capsular fornix, and I irrigate the anterior chamber angle to remove OVD and verify that no lens fragments remain in the angle. I verify that the IOL is well centered, perform a final bit of stromal hydration, check the IOP, and surgery is complete.
My typical postoperative regimen includes a topical antibiotic four times daily for 1 week, a NSAID once daily for 3 weeks, prednisolone acetate 1% four times daily for 6 weeks, and cyclopentolate 1% at bedtime for 1 week.
CONCLUSION
Cataract surgery techniques certainly vary. I have found the method outlined here and in my accompanying video to be both safe and effective. This is my routine procedure, and I may need to modify it depending on intraoperative events or the existence of anatomic issues such as zonular laxity or a shallow chamber.

